Auto-Stop Disable
Auto-Stop turns your engine off when stopped on AGS or CVT models, to improve fuel efficiency. The method shown in this article not only disables it, but makes it like it never existed. No dash lights at all, no warnings, no chimes.
So why would you want to disable this?
- It pisses you off, and you are sick of pressing the disable button every time you get in the car.
- You've replaced your "auto-stop" compatible battery with a cheaper conventional one. See below why this is an issue
- You're running a DRL controller, and your lights are turning off sometimes when stopped (due to same issues in number 2)
- Hesitation/delay for the engine to re-start could be potentially dangerous if having to pull out in a hurry.
So how would having a non-compatible battery be a problem, when you're hitting the disable button anyway? - Well, even with it "disabled" via the switch, the car still does weird stuff with voltage, like it's preparing to shut down the engine.
The way idle-stop works is by meeting a set of criteria (distance, speed etc.) and then shutting down the engine. A small lithium-ion battery within the controller then provides accessory power, so your radio/accessories won't restart when the engine is cranked again.
So how can this be disabled, in the fashion mentioned in the first paragraph? - Well, this is a crucial part of the "conditions" that are needed to be for it to be enabled in the first place - one of which is the bonnet (hood) being closed.
You can see this yourself by starting the engine with the bonnet open - you won't see any auto-stop dash light at all.
There's the answer - detach the bonnet switch, and jump 2 of the pins, making the car think the bonnet is aways open. Luckily, this does not affect any other systems in the car, and just makes auto-stop disappear - you'll have no green enabled light, nor orange disabled light - and all it costs is a bit of wire and some tape!
Mod instructions :
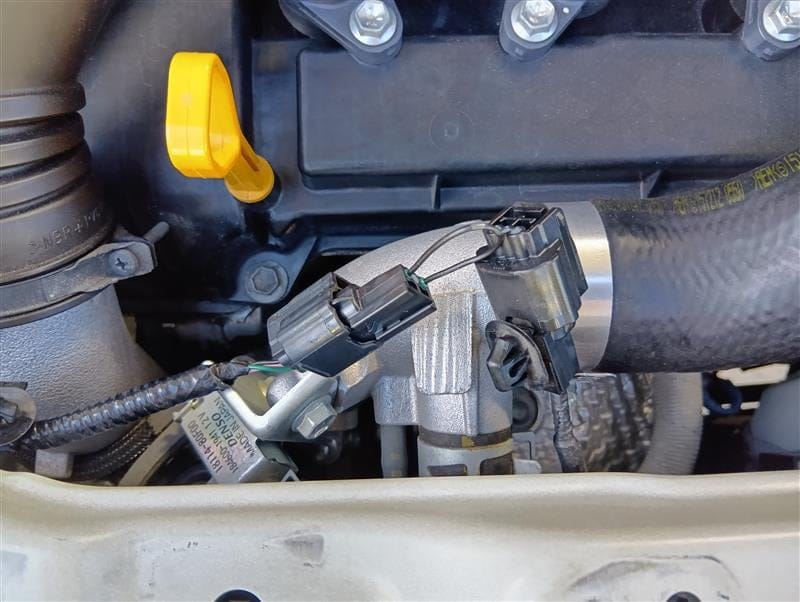
- Unclip and disconnect the switch shown in the diagram here. Note - you want to do this mod to the left side connector (connector 1 on the diagram, but the side with pin sockets, not pins)
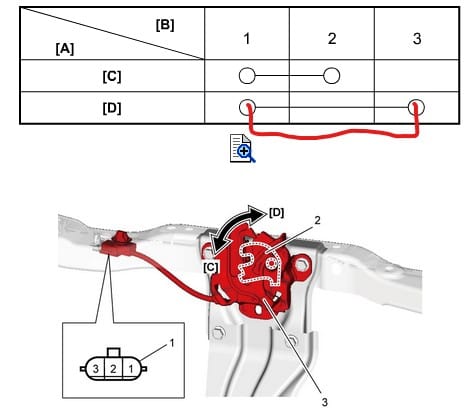
- On the left hand side of the connector, use a wire (or paperclip) to jump 1 to 3. Use as small a wire as you can (unlike in this photo), makes it easier to tape up after.
- Tape up both side of the connector, to prevent any water possibly getting in there.
- Secure the left hand side of the harness, I found attaching it to the indicator wires with a zip tie to work well
You're done! Easy!